
If you’re like me, you HATE HATE HATE the look of VS 2012. It’s not only ugly; it’s unergonomic.
So naturally, a number of people have worked to make VS 2012 look like 2010. VS 2010’s look, IMNSHO, was a lot clearer and developer-friendlier.
So here’s a list of steps that have been tested and work :
0. Close both VS 2012 and VS 2010
1. If you haven’t already, install VS 2012 Update 2 or later (here)
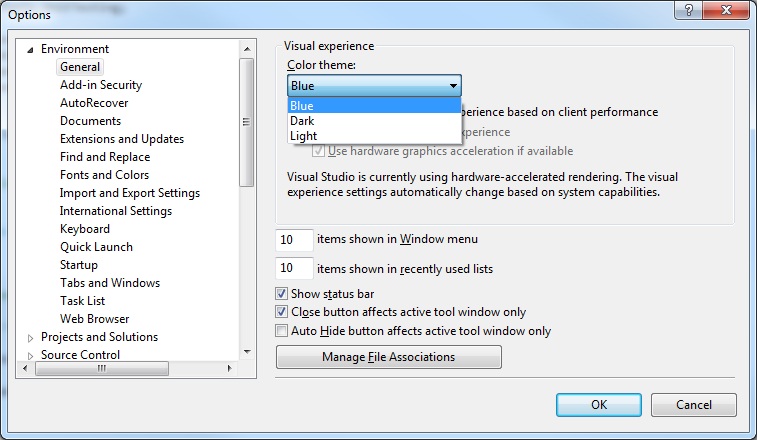
2. With Update 2 or later, a new theme called “Blue” is available alongside “Dark” (the default) and “Light”. Select this one (you can find it in Tools -> Options -> Environment -> General) and click OK.
3. Download the “Visual Studio Icon Patcher” from MS CodePlex (here)
4. Unzip it in a new folder
5. Open Visual Studio Command Prompt (use “Run as an Administrator”). In the command prompt, enter the following commands :
cd whatever-folder-you-have-unzipped-the-file-in
VSIP.exe
You’re now in the VSIP prompt. Continue typing (obviously you have to hit enter after each line –but you knew that already) :
backup -v=2012
extract
inject
menus
x
Done ! The outcome looks like this :

Important note : The commands in step #5 assume that you have both VS 2012 and 2010 installed on your machine. If you don’t, you need to a) “extract” from a machine with VS 2010 installed b) copy the folder created (it’s called Images, and it’s placed under the new folder in which you unzipped Visual Studio Icon Patcher) and c) “inject” it in the target machine (i.e. the dev PC with VS 2012).
